Step 1:
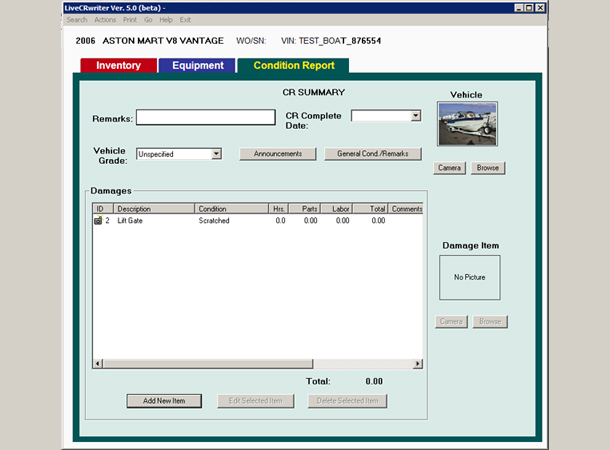
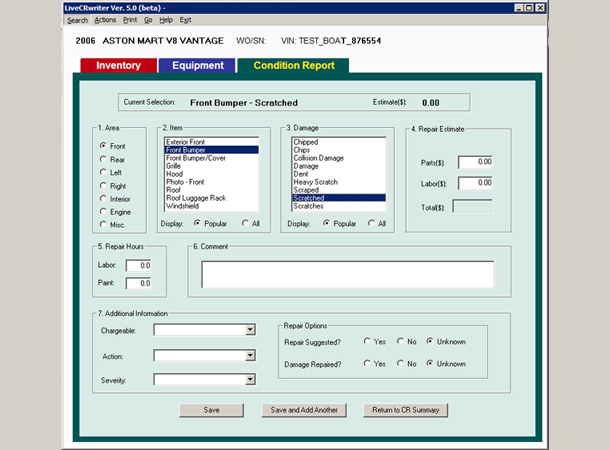
Click on the “Add New Item” button. The CR edit screen will appear.
On this screen you can add or edit damage items that appear on the CR
Step 2:
Select the “Area” of the vehicle were the damage is located. In this example we’ve selected the “Front” area radio button.
After you select the area, the “Item” listbox will show the most commonly used items for the area selected. Instead of
searching through hundreds of items, this list contains the item you want 99.9% of the time. If by some chance it does not
contain the item you need, just click the “All” radio button to select from the full list.
Step 3:
Select the “Item” that contains the damage from the “Damage” listbox. In this example we’ve selected the “Hood” item.
After you select the Item, the “Damage” listbox will show the most commonly used damages for the item selected. Instead
of searching through hundreds of damages, this list contains the damages you want 99.9% of the time. If by some chance it does
not contain the damage you need, just click the “All” button to select from the full list.
